0去购物车结算
购物车中还没有商品,赶紧选购吧!
当前位置: 图书分类 > 考古/历史 > 博物馆 > 纳提什瓦 : 孟加拉国毗诃罗普尔古城2013—2017年发掘报告

相同语种的商品

浏览历史

纳提什瓦 : 孟加拉国毗诃罗普尔古城2013—2017年发掘报告


联系编辑
 
标题:
 
内容:
 
联系方式:
 
  
纳提什瓦 : 孟加拉国毗诃罗普尔古城2013—2017年发掘报告
  • 书号:9787030609137
    作者:湖南省文物考古研究所,(孟加拉)阿哥拉萨—毗诃罗普尔基金会
  • 外文书名:
  • 装帧:平脊精装
    开本:大16
  • 页数:434
    字数:750000
    语种:zh-Hans
  • 出版社:科学出版社
    出版时间:2019-03-01
  • 所属分类:
  • 定价: ¥480.00元
    售价: ¥379.20元
  • 图书介质:
    纸质书

  • 购买数量: 件  可供
  • 商品总价:

相同系列
全选

内容介绍

样章试读

用户评论

全部咨询

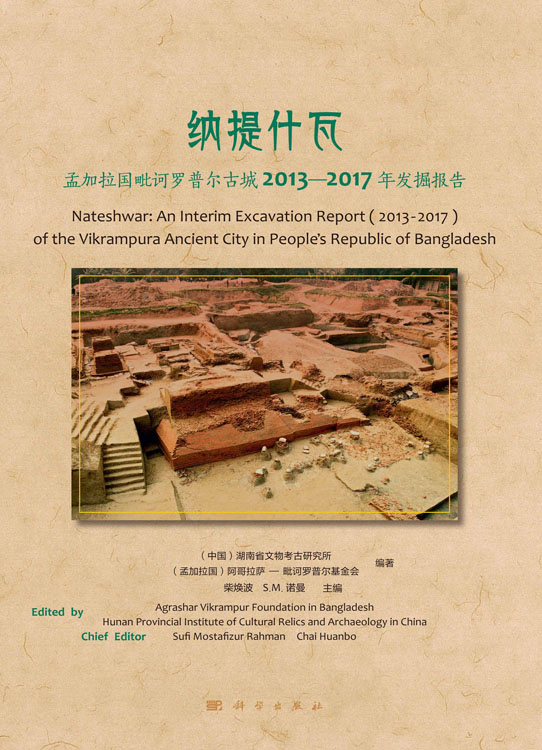
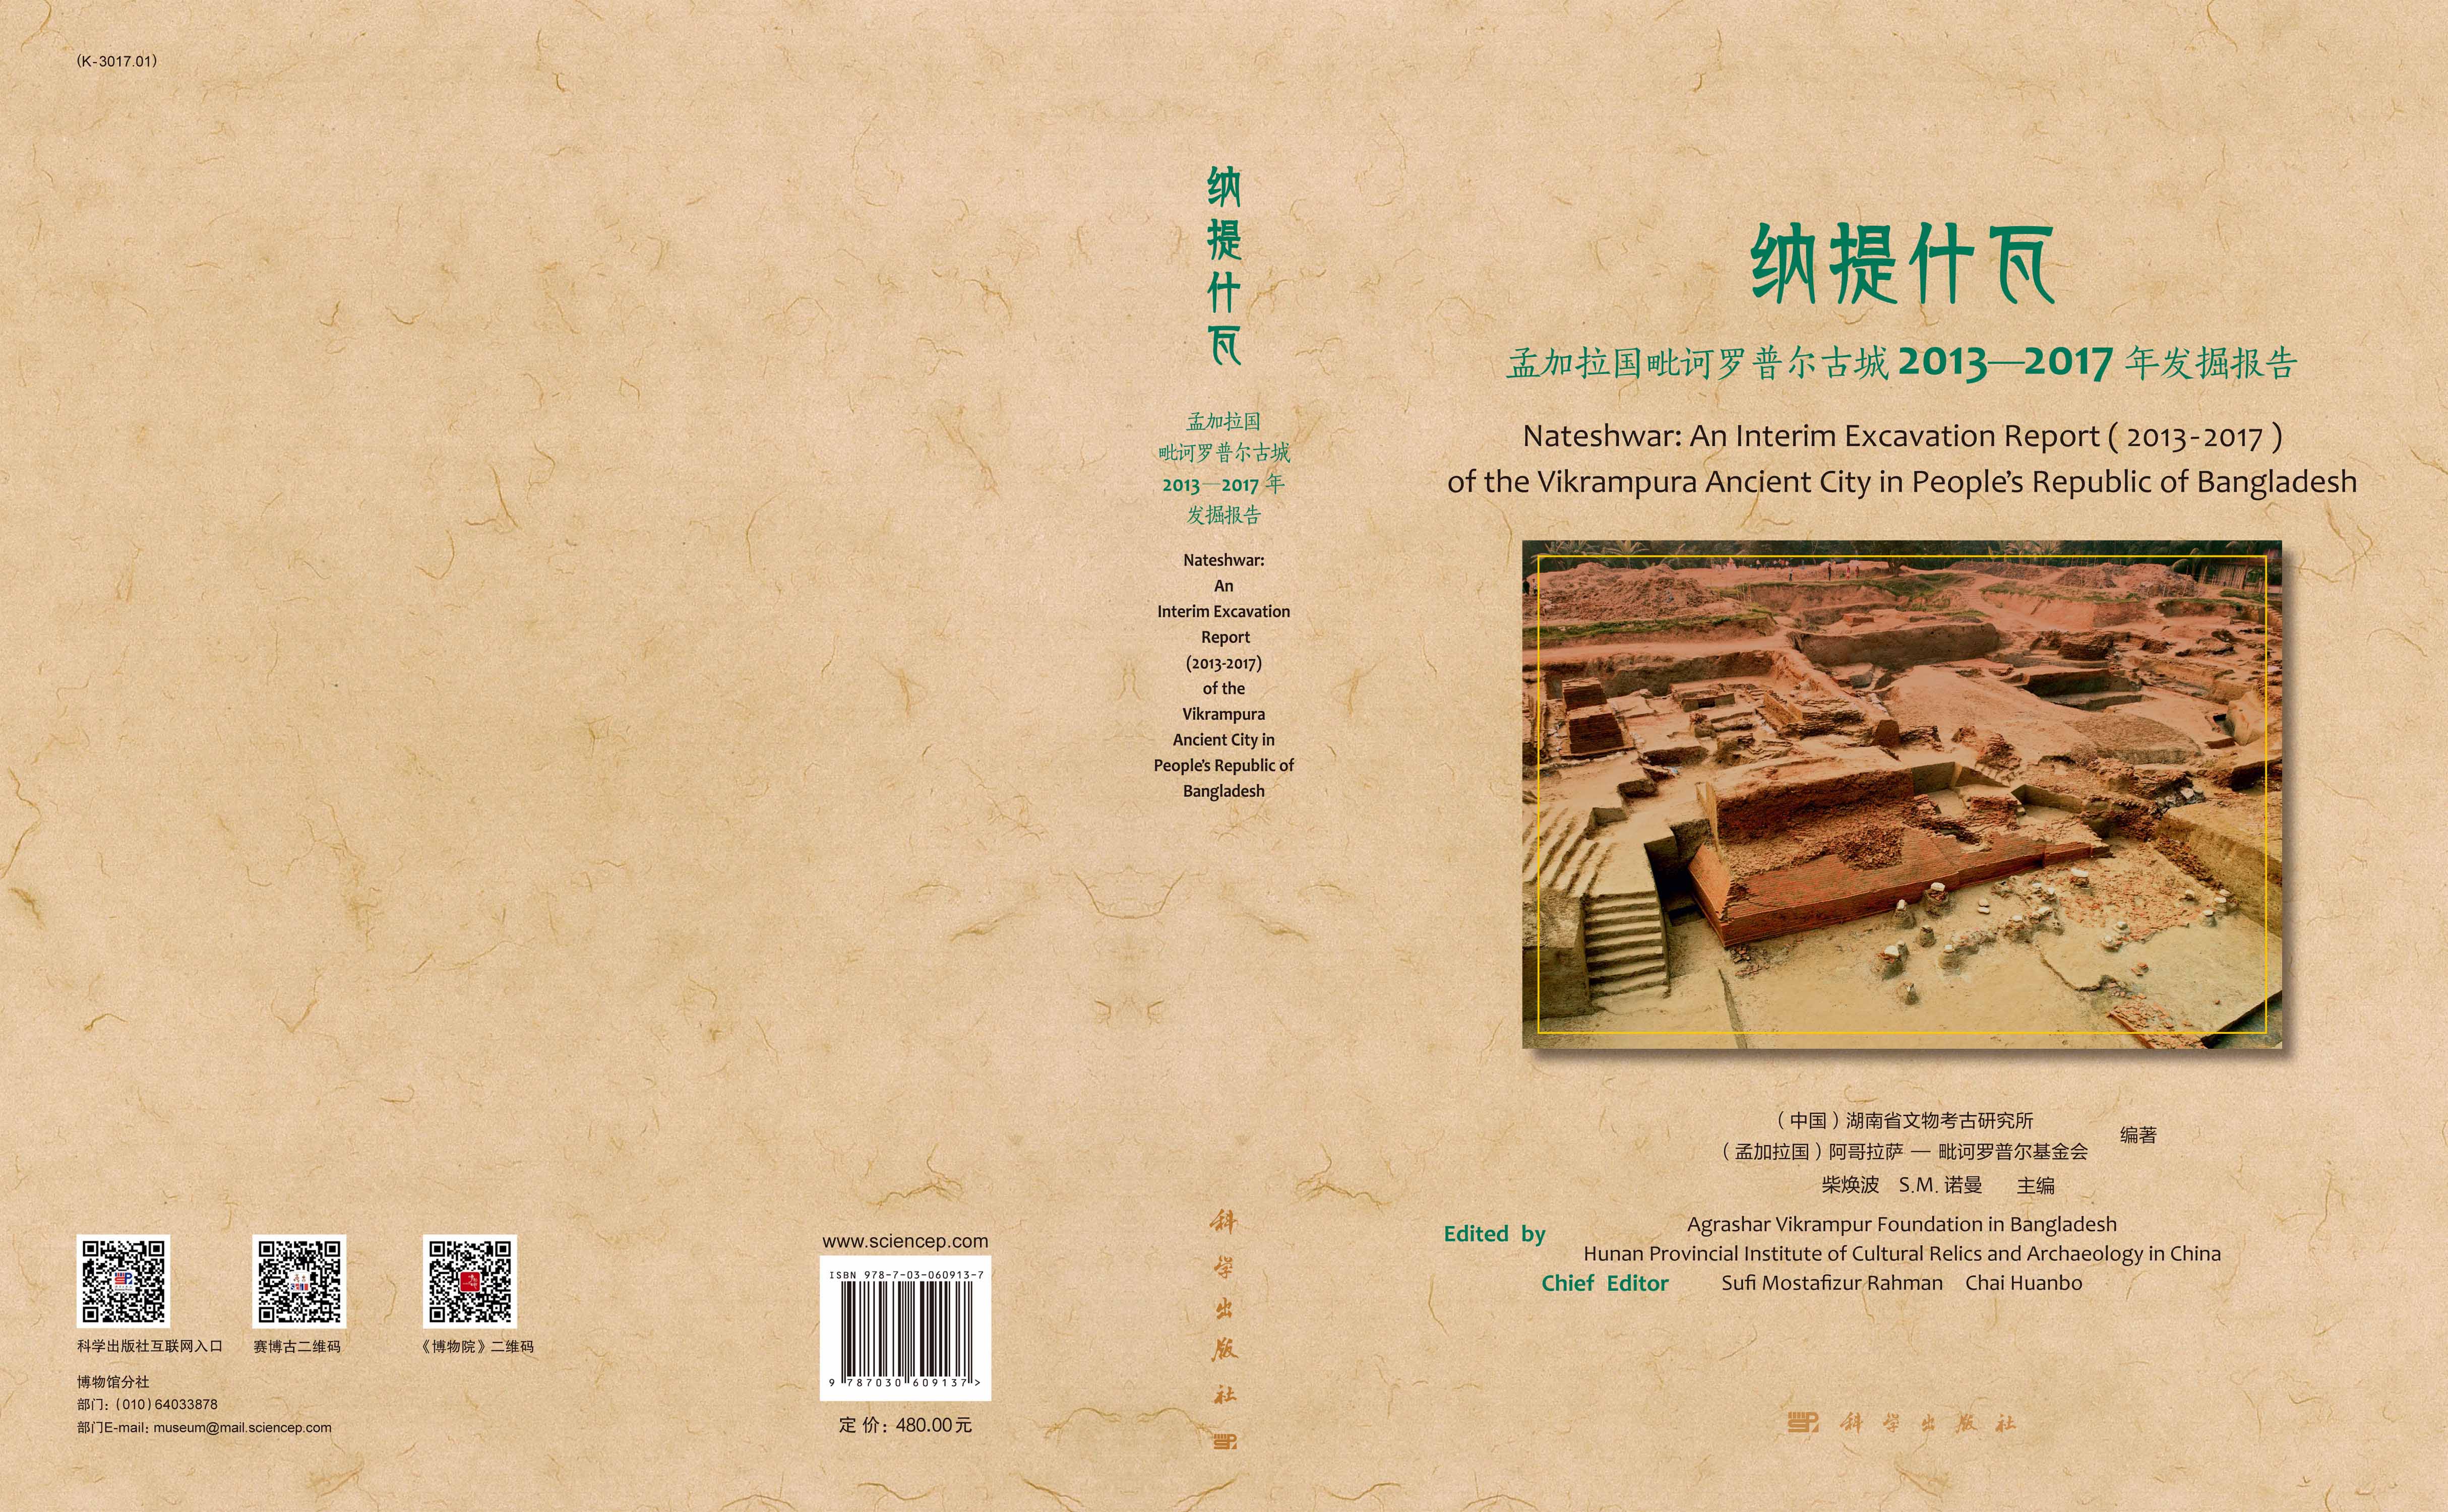
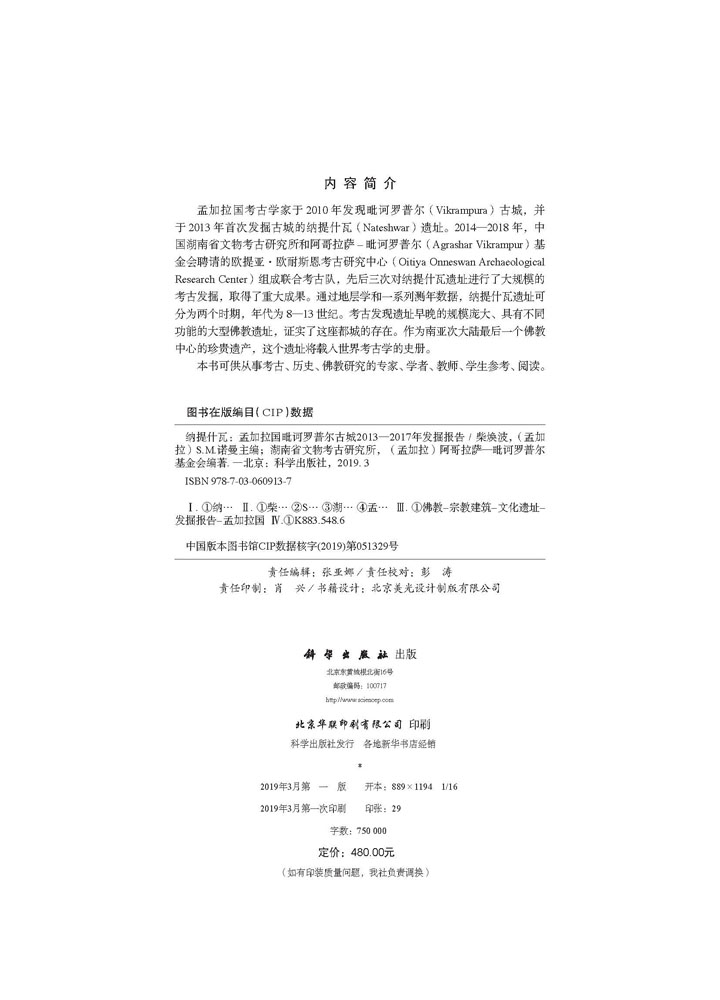
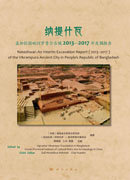
孟加拉国考古学家于2010年发现毗诃罗普尔(Vikrampura)古城,并于2013年首次发掘古城的纳提什瓦(Nateshwar)遗址。2014—2018 年,中国湖南省文物考古研究所和阿哥拉萨–毗诃罗普尔(Agrashar Vikrampur)基金会聘请的欧提亚·欧耐斯恩考古研究中心(Oitiya Onneswan Archaeological Research Center)组成联合考古队,先后三次对纳提什瓦遗址进行了大规模的考古发掘,取得了重大成果。通过地层学和一系列测年数据,纳提什瓦遗址可分为两个时期,年代为8—13世纪。考古发现遗址早晚的规模庞大、具有不同功能的大型佛教遗址,证实了这座都城的存在。作为南亚次大陆最后一个佛教中心的珍贵遗产,这个遗址将载入世界考古学的史册。
样章试读
  • 暂时还没有任何用户评论
总计 0 个记录,共 1 页。 第一页 上一页 下一页 最末页

全部咨询(共0条问答)

  • 暂时还没有任何用户咨询内容
总计 0 个记录,共 1 页。 第一页 上一页 下一页 最末页
用户名: 匿名用户
E-mail:
咨询内容:

目录

  • 目录
    第一章 绪论
    第一节 地理位置 2
    第二节 自然环境 6
    第三节 历史沿革 9
    第四节 考古历程 15
    第二章 地层
    第一节 地层综述 44
    第二节 地层举例 49
    第三节 地层年代的14C 数据分析 64
    第三章 遗迹
    第一节 第一期遗迹 76
    一 早段遗迹 76
    二 中段遗迹 80
    三 晚段遗迹 90
    第二节 第二期遗迹(上)——十字形中心神殿建筑 101
    一 发掘经过 101
    二 层位关系 101
    三 遗迹描述 102
    四 年代推断 118
    五 对于建筑复原的设想 119
    第三节 第二期遗迹(下)——其他遗迹 134
    一 八边形佛塔1 134
    二 八边形佛塔2 134
    三 八边形佛塔3 139
    四 曲折形围墙1 139
    五 路面1 139
    六 路面3 141
    第四节 第三期遗迹 148
    第四章 遗物
    第一节 陶器 224
    第二节 其他出土遗物 308
    第五章 结语
    第一节 纳提什瓦遗址的年代分期和遗址兴废过程的历时性描述 326
    第二节 纳提什瓦遗址的核心价值 335
    第三节 纳提什瓦遗址进一步发掘、保护的设想 337
    附录
    附录一 美国贝塔(Beta)实验室14C 测定数据 342
    附录二 孟加拉国纳提什瓦遗址出土动物遗存 347
    附录三 孟加拉国纳提什瓦遗址炭化米分析 359
    专文 8—12 世纪东印度佛教建筑、造像对于西藏的传播/ 柴焕波 361
    Contents
    Chapter I Preface
    Section 1 Geographical Background 2
    Section 2 Natural Environment 6
    Section 3 Brief History 9
    Section 4 Archaeological Process 15
    Chapter II Stratigraphy
    Section 1 Comprehensive Introduction 44
    Section 2 Section Description 49
    Section 3 Analysis of Stratigraphy Radiocarbon Dates 64
    Chapter III Cultural Remains
    Section 1 The First Period Cultural Remains 76
    1. Early Stage 76
    2. Middle Stage 80
    3. Late Stage 90
    Section 2 The Second Period Cultural Remains (Part I): Cruciform Central Temple 101
    1. Excavation Process 101
    2. Stratigrapical Context 101
    3. Remains Description 102
    4. Age of the Construction 118
    5. Conception on the Architectural Reconstruction 119
    Section 3 The Second Period (Ⅱ): Other Features 134
    1. Octagonal Stupa 1 134
    2. Octagonal Stupa 2 134
    3. Octagonal Stupa 3 139
    4. Zigzag Boundary Wall 1 139
    5. Floor 1 139
    6. Floor 3 141
    Section 4 The Third Period 148
    Chapter IV Unearthed Artifacts
    Section 1 Pottery 224
    Section 2 Other Unearthed Objects 308
    Chapter V Conclusion
    Section 1 The Chronological Periods and the Rise and Decline of the Site 326
    Section 2 The Main Value of the Nateshwar Site 335
    Section 3 The Further Excavation and Conservation at Nateshwar Site 337
    Appendix
    Appendix 1: Radiocarbon Dates from US Beta Laboratory 342
    Appendix 2: Identification Report of Fauna Specimens at Nateshwar Site 347
    Appendix 3: Study of Carbonized Rice in Nateshwar site, Bangladesh 359
    Special Paper
    Research on the Buddhist Remains of Bangladesh During the 8th to 12th
    Centuries and Their Influences on Tibet (by Chai Huanbo) 361
    图1-1 孟加拉国地理位置图 2
    图1-2 毗诃罗普尔古城地理位置图 3
    图1-3 纳提什瓦遗址平面位置图 4
    图1-4 拉库罗普尔(Raghurampur)遗址、纳提什瓦遗址、阿底峡故乡金刚瑜伽(Vairajogini)村平面位置图 7
    图1-5 纳提什瓦遗址历年发掘探方分布图 17
    图2-1 纳提什瓦遗址地层剖面位置图 49
    图2-2 UnitJ10GridA10、B10、C10、D10、E10、E9剖面图 50
    图2-3 UnitJ11GridE1、D1、C1、B1、A1剖面图 51
    图2-4 UnitJ11GridE6、E5、E4、E3、E2、E1剖面图 51
    图2-5 UnitI11GridH6、I6、J6,UnitJ11GridA6、B6、C6、D6、E6剖面图 52
    图2-6 UnitI10GridG8、G9、G10,UnitI11GridG1、G、G3、G4、G5剖面图 53
    图2-7 UnitK9GridA8、B8、C8、D8、E8、F8、G8、H8剖面图 54
    图2-8 UnitL9GridA9、B9、C9、D9、E9、F9剖面图 55
    图2-9 UnitL8GridF2、F3、F4剖面图 56
    图2-10 UnitK7GridI10,UnitK8GridI1-I10,UnitK9GridI1-I7剖面图 57
    图2-11 UnitH10GridJ5-J1,UnitI9GridA10-A3剖面图 59
    图2-12 UnitI9GridJ1,UnitJ9GridA1、B1、C1、D1、E1、F1、G1、H1剖面图 59
    图2-13 UnitJ9GridH5、G5、F5、E5、D5、C5、B5、A5,UnitI9GridJ5、I5、H5剖面图 60
    图2-14 UnitJ10GridD8、D7、D6、D5、D4、D3、D2、D1,UnitJ9GridD10、D9、D8、D7、D6、D5剖面图 62
    图3-1 纳提什瓦遗址第一期遗迹总平面图 76
    图3-2 神殿1前期建筑平剖面图 78
    图3-3 神殿1后期建筑平剖面图 78
    图3-4 神殿1西壁立面图 79
    图3-5 道路3北段、道路4、墙1平剖面图 81
    图3-6 道路3中段平剖面图 81
    图3-7 浴室及排水沟平剖面图 82
    图3-8 神殿2平剖面图 84
    图3-9 房屋1平剖面图 86
    图3-10 房屋5平剖面图 88
    图3-11 墙3平剖面图 89
    图3-12 十字形中心神殿建筑平面图 103
    图3-13 十字形中心神殿建筑柱厅1平剖面图 104
    图3-14 十字形中心神殿建筑柱厅1柱基平剖面图 105
    图3-15 十字形中心神殿建筑柱厅2平剖面图 109
    图3-16 十字形中心神殿建筑柱厅2柱基平剖面图 110
    图3-17 十字形中心神殿建筑柱厅3平剖面图 112
    图3-18 十字形中心神殿建筑柱厅4平剖面图 115
    图3-19 十字形中心神殿建筑北门遗迹平剖面图 119
    图3-20 纳提什瓦遗址第二期遗迹总平面图 135
    图3-21 八边形佛塔1平剖面图 136
    图3-22 八边形佛塔2平剖面图 138
    图3-23 曲折形围墙1平剖面图 140
    图4-1 UnitL10GridI5-J6,UnitJ11GridC1-D2①层出土陶器 225
    图4-2 UnitL10GridE6②层出土陶器 226
    图4-3 UnitI10GridI3,UnitL10,UnitJ11,UnitK9GridF10,UnitI11②层出土陶器 227
    图4-4 H1出土陶器 228
    图4-5 H1出土陶器 229
    图4-6 H1出土陶器 230
    图4-7 UnitI10-I11④层出土陶器 231
    图4-8 UnitI10-I11,UnitL10GridE6,UnitL10GridE5-F6④层出土陶器 232
    图4-9 UnitI10GridI11,UnitJ10-I6,UnitK10GridI3④层出土陶器 233
    图4-10 UnitK10-I4,UnitL10GridD6,UnitL10GridE5-F6④层出土陶器 234
    图4-11 UnitI10-I11,UnitL10GridE6④层出土陶器 234
    图4-12 UnitL10GridE5-F6,UnitI10-I11,UnitL10GridF6④层出土陶器 235
    图4-13 UnitI10-I11,UnitL10GridA6、B6、C6、D6、E6,UnitL10GridE5、F6④层出土陶器 236
    图4-14 UnitK10GridI2-I6、J2-J6⑤层出土陶器 238
    图4-15 UnitK10GridI2-I6、J2-J6,UnitL10GridE5-F6⑤层出土陶器 239
    图4-16 UnitL8GridG5-F5⑤层下部出土陶器 240
    图4-17 UnitL8GridG5-F5⑤层下部出土陶器 241
    图4-18 UnitL8GridG5-F5⑤层下部出土陶器 242
    图4-19 UnitL8GridG5-F5⑤层下部出土陶器 243
    图4-20 UnitL8GridG5-F5⑤层下部出土陶器 244
    图4-21 UnitL8GridG5-F5⑤层下部出土陶器 245
    图4-22 UnitL10GridA2-A3⑤—⑥层之间出土陶器 246
    图4-23 瓮(W1∶19) 247
    图4-24 瓮1内出土陶器 248
    图4-25 瓮1内出土陶器 248
    图4-26 瓮1内出土陶器 249
    图4-27 瓮1内出土陶器 249
    图4-28 瓮1内出土陶器 251
    图4-29 瓮2内出土A型壶 252
    图4-30 瓮2内出土B型罐 252
    图4-31 瓮2内出土陶器 253
    图4-32 UnitI11GridG2-G3⑥层表层出土陶器 255
    图4-33 UnitI11GridG3,UnitI11GridG2-G3⑥层表层出土陶器 256
    图4-34 UnitI10GridG9-I11、G2、G3、G4、G5,UnitL10 GridE5-F6,UnitL8GridF5-G5⑥层出土陶器 257
    图4-35 UnitI10GridG9-I11、G2、G3、G4、G5,UnitL8 GridF5-G5⑥层出土陶器 258
    图4-36 UnitL11GridE5-F6,UnitI10GridG9-I11、G2、G3、G4、G5⑥层出土陶器 259
    图4-37 UnitL8GridF5-G5⑥层B型罐 259
    图4-38 UnitL10GridE5-F6,UnitI10GridG9-I11、G2、G3、G4、G5⑥层出土陶器 260
    图4-39 UnitL8GridF5-G5,UnitL10GridE6⑥层出土陶器 262
    图4-40 UnitL10GridE5-F6,UnitI10GridG9-I11、G2、G3、G4、G5⑥层出土陶器 263
    图4-41 UnitL10GridE5-F6,UnitI10GridG9-I11、G2、G3、G4、G5,UnitL8GridF5-G5⑥层出土陶器 264
    图4-42 UnitL10GridE5-F6,UnitI10GridG9-I11、G2、G3、G4、G5⑥层出土陶器 265
    图4-43 UnitL10GridE6,UnitL8GridF5-G5⑥层出土陶器 266
    图4-44 UnitI10GridG9-I11、G2、G3、G4、G5,UnitL10GridE5-F6,UnitL8GridF5-G5⑥层出土陶器 267
    图4-46 UnitI10GridG9-I11、G2、G3、G4、G5⑦层出土陶器 269
    图4-45 UnitI10GridG9-I11、G2、G3、G4、G5,UnitI11Grid G3⑦层出土陶器 269
    图4-47 UnitI10GridG9-I11、G2、G3、G4、G5⑦层出土陶器 270
    图4-48 UnitI10GridG9-I11、G2、G3、G4、G5⑦层出土陶器 271
    图4-49 UnitI10GridG9-I11、G2、G3、G4、G5⑦层出土陶器 272
    图4-50 UnitI10GridG9-I11、G2、G3、G4、G5⑦层出土陶器 273
    图4-51 UnitI10GridG9-I11、G2、G3、G4、G5⑦层出土陶器 273
    图4-52 UnitI10GridG9-I11、G2、G3、G4、G5⑦层出土陶器 274
    图4-53 UnitI10GridG9-I11、G2、G3、G4、G5⑦层出土陶器 275
    图4-54 铁钉 308
    图5-1 纳提什瓦遗址遗迹总平面图 327
    Fig. 1-1 Geographical map of Bangladesh 2
    Fig. 1-2 Geographical map of Vikrampura site 3
    Fig. 1-3 The location plan of Nateshwar area 4
    Fig. 1-4 The location plan of Raghurampur site, Nateshwar site and Vairajogini Village of the hometown of Atisha Dipankara Srijnana 7
    Fig. 1-5 The distribution of test grids over the years at Nateshwar site 17
    Fig. 2-1 The location map of the stratigraphic sections at Nateshwar site 49
    Fig. 2-2 The section of UnitJ10GridA10, B10, C10, D10, E10, E9 50
    Fig. 2-3 The section of UnitJ11GridE1, D1, C1, B1, A1 51
    Fig. 2-4 The section of UnitJ11GridE6, E5, E4, E3, E2, E1 51
    Fig. 2-5 The section of UnitI11GridH6, I6, J6, UnitJ11GridA6, B6, C6, D6, E6 52
    Fig. 2-6 The section of UnitI10GridG8, G9, G10, UnitI11GridG1, G, G3, G4, G5 53
    Fig. 2-7 The section of UnitK9GridA8, B8, C8, D8, E8, F8, G8, H8 54
    Fig. 2-8 The section of UnitL9GridA9, B9, C9, D9, E9, F9 55
    Fig. 2-9 The section of UnitL8GridF2, F3, F4 56
    Fig. 2-10 The section of UnitK7GridI10, UnitK8GridI1-I10, UnitK9GridI1-I7 57
    Fig. 2-11 The section of UnitH10GridJ5-J1, UnitI9GridA10-A3 59
    Fig. 2-12 The section of UnitI9GridJ1, UnitJ9GridA1, B1, C1, D1, E1, F1, G1, H1 59
    Fig. 2-13 The section of UnitJ9GridH5, G5, F5, E5, D5, C5, B5, A5, UnitI9GridJ5, I5, H5 60
    Fig. 2-14 The section of UnitJ10GridD8, D7, D6, D5, D4, D3, D2, D1,UnitJ9GridD10, D9, D8, D7, D6, D5 62
    Fig. 3-1 The master plan of the cultural remains of the first Period at Nateshwar site 76
    Fig. 3-2 The plan and section of the early phase of Temple 1 78
    Fig. 3-3 The plan and section of the late phase of Temple 1 78
    Fig. 3-4 The elevation of the western wall of Temple 1 79
    Fig. 3-5 The plan and section of the northern part of Road 3, Road 4 and Wall 1 81
    Fig. 3-6 The plan and section of the middle part of Road 3 81
    Fig. 3-7 The plan and section of bathroom and drainage 82
    Fig. 3-8 The plan and section of Temple 2 (pyramid-shaped stupa) 84
    Fig. 3-9 The plan and section of House 1 86
    Fig. 3-10 The plan and section of House 5 88
    Fig. 3-11 The plan and section of Wall 3 89
    Fig. 3-12 The plan of Cruciform Central Temple 103
    Fig. 3-13 The plan and section of Pillared-hall 1, Cruciform Central Temple 104
    Fig. 3-14 The plan and section of Pillar-plinth of Pillared-hall 1, Cruciform Central Temple 105
    Fig. 3-15 The plan and section of Pillared-hall 2, Cruciform Central Temple 109
    Fig. 3-16 The plan and section of pillar-plinth of the Pillared-hall 2, Cruciform Central Temple 110
    Fig. 3-17 The plan and section of Pillared-hall 3 , Cruciform Central Temple 112
    Fig. 3-18 The plan and section of Pillared-hall 4, Cruciform Central Temple 115
    Fig. 3-19 The plan and section of the north entrance of the Cruciform Central Temple 119
    Fig. 3-20 The master plan of the second period cultural remains at Nateshwar site 135
    Fig. 3-21 The plan and section of Octagonal Stupa 1 136
    Fig. 3-22 The plan and section of Octagonal Stupa 2 138
    Fig. 3-23 The plan and section of Zigzag Boundary Wall 1 140
    Fig. 4-1 The unearthed potteries of Layer 1 from UnitL10GridI5-J6, UnitJ11GridC1-D2 225
    Fig. 4-2 The unearthed potteries of Layer 2 from UnitL10GridE6 226
    Fig. 4-3 The unearthed potteries of Layer 2 from UnitI10GridI3,UnitL10, UnitJ11, UnitK9GridF10 and UnitI11 227
    Fig. 4-4 The unearthed potteries from H1 228
    Fig. 4-5 The unearthed potteries from H1 229
    Fig. 4-6 The unearthed potteries from H1 230
    Fig. 4-7 The unearthed potteries of Layer 4 from UnitI10-I11 231
    Fig. 4-8 The unearthed potteries of Layer 4 from UnitI10-I11, UnitL10GridE6, UnitL10GridE5-F6 232
    Fig. 4-9 The unearthed potteries of Layer 4 from UnitI10GridI11, UnitJ10-I6, UnitK10GridI3 233
    Fig. 4-10 The unearthed potteries of Layer 4 from UnitK10-I4, UnitL10GridD6,UnitL10GridE5-F6 234
    Fig. 4-11 The unearthed potteries of Layer 4 from UnitI10-I11, UnitL10GridE6 234
    Fig. 4-12 The unearthed potteries of Layer 4 from UnitL10GridE5-F6, UnitI10-I11, UnitL10GridF6 235
    Fig. 4-13 The unearthed potteries of Layer 4 from UnitI10-I11,UnitL10GridA6, B6, C6, D6, E6, UnitL10GridE5, F6 236
    Fig. 4-14 The unearthed potteries of Layer 5 from UnitK10GridI2-I6, J2-J6 238
    Fig. 4-15 The unearthed potteries of Layer 5 from UnitK10GridI2-I6, J2-J6, UnitL10GridE5-F6 239
    Fig. 4-16 The unearthed potteries of lower Layer 5 from UnitL8GridG5-F5 240
    Fig. 4-17 The unearthed potteries of lower Layer 5 from UnitL8GridG5-F5 241
    Fig. 4-18 The unearthed potteries of lower Layer 5 from UnitL8GridG5-F5 242
    Fig. 4-19 The unearthed potteries of lower Layer 5 from UnitL8GridG5-F5 243
    Fig. 4-20 The unearthed potteries of lower Layer 5 from UnitL8GridG5-F5 244
    Fig. 4-21 The unearthed potteries of lower Layer 5 from UnitL8GridG5-F5 245
    Fig. 4-22 The unearthed potteries between Layer 5 and layer 6 from UnitL10GridA2-A3 246
    Fig. 4-23 The Urn (W1∶19) 247
    Fig. 4-24 The unearthed potteries from Urn 1 248
    Fig. 4-25 The unearthed potteries from Urn 1 248
    xiii
    Fig. 4-26 The unearthed potteries from Urn 1 249
    Fig. 4-27 The unearthed potteries from Urn 1 249
    Fig. 4-28 The unearthed potteries from Urn 1 251
    Fig. 4-29 The A-type jug unearthed from Urn 2 252
    Fig. 4-30 The B-type pot unearthed from Urn 2 252
    Fig. 4-31 The unearthed potteries from Urn 2 253
    Fig. 4-32 The unearthed potteries of Layer 6 from UnitI11GridG2-G3 255
    Fig. 4-33 The unearthed potteries of top Layer 6 from UnitI11GridG3, UnitI11GridG2-G3 256
    Fig. 4-34 The unearthed potteries of Layer 6 from UnitI10GridG9-I11, G2, G3, G4, G5,UnitL10GridE5-F6, UnitL8GridF5-G5 257
    Fig. 4-35 The unearthed potteries of Layer 6 from UnitI10GridG9-I11, G2, G3, G4, G5,UnitL8GridF5-G5 258
    Fig. 4-36 The unearthed potteries of Layer 6 from UnitL11GridE5-F6,UnitI10GridG9-I11, G2, G3, G4, G5 259
    Fig. 4-37 The B-type pot of Layer 6 from UnitL8GridF5- G5 259
    Fig. 4-38 The unearthed potteries of Layer 6 from UnitL10GridE5-F6,UnitI10GridG9-I11, G2, G3, G4, G5 260
    Fig. 4-39 The unearthed potteries of Layer 6 from UnitL8GridF5-G5, UnitL10GridE6 262
    Fig. 4-40 The unearthed potteries of Layer 6 from UnitL10GridE5-F6,UnitI10GridG9-I11, G2, G3, G4, G5 263
    Fig. 4-41 The unearthed potteries of Layer 6 from UnitL10GridE5-F6,UnitI10GridG9-I11, G2, G3, G4, G5, UnitL8GridF5-G5 264
    Fig. 4-42 The unearthed potteries of Layer 6 from UnitL10GridE5-F6,UnitI10GridG9-I11, G2, G3, G4, G5 265
    Fig. 4-43 The unearthed potteries of Layer 6 from UnitL10GridE6, UnitL8GridF5-G5 266
    Fig. 4-44 The unearthed potteries of Layer 6 from UnitI10GridG9-I11, G2, G3, G4, G5,UnitL10GridE5-F6, UnitL8GridF5-G5 267
    Fig. 4-45 The unearthed potteries of Layer 7 from UnitI10GridG9-I11, G2, G3, G4,G5,UnitI11GridG3 269
    Fig. 4-46 The unearthed potteries of Layer 7 from UnitI10GridG9-I11, G2, G3, G4, G5 269
    Fig. 4-47 The unearthed potteries of Layer 7 from UnitI10GridG9-I11, G2, G3, G4, G5 270
    Fig. 4-48 The unearthed potteries of Layer 7 from UnitI10GridG9-I11, G2, G3, G4, G5 271
    Fig. 4-49 The unearthed potteries of Layer 7 from UnitI10GridG9-I11, G2, G3, G4, G5 272
    Fig. 4-50 The unearthed potteries of Layer 7 from UnitI10GridG9-I11, G2, G3, G4, G5 273
    Fig. 4-51 The unearthed potteries of Layer 7 from UnitI10GridG9-I11, G2, G3, G4, G5 273
    Fig. 4-52 The unearthed potteries of Layer 7 from UnitI10GridG9-I11, G2, G3, G4, G5 274
    Fig. 4-53 The unearthed potteries of Layer 7 from UnitI10GridG9-I11, G2, G3, G4, G5 275
    Fig. 4-54 Iron nail 308
    Fig. 5-1 The master plan of cultural remains at Nateshwar excavation site 327
    表1 UnitI10、I11、J10、J11 ①层陶器统计表 224
    表2 UnitI10、I11、J10、J11 ②层陶器统计表 226
    表3 UnitI10、I11、J10、J11 ④层陶器统计表 229
    表4 UnitK10GridI2-I6、J2-J6 ⑤层陶器统计表 237
    表5 UnitL8GridG5-F5 ⑤层下部陶器统计表 237
    表6 UniL10GridA2-A3 ⑤—⑥层之间陶器统计表 238
    表7 UnitI10GridG9,UnitI11GridG2、G3、G4、G5 ⑥层陶器统计表 254
    表8 UnitL10GridE5-F6(神殿1 北部探坑)⑥层陶器统计表 254
    表9 UnitI10GridG9,UnitI11GridG2、G3、G4、G5 ⑦层陶器统计表 268
    表10 纳提什瓦遗址地层和遗迹单位的分期表 326
    附表目录
    Table Catalogue
    Table 1 Statistic table of the potteries of Layer 1 in Unit I10, I11, J10 and J11 277
    Table 2 Statistic table of the potteries of Layer 2 in Unit I10, I11, J10 and J11 278
    Table 3 Statistic table of the potteries of Layer 3 in Unit I10, I11, J10 and J11 279
    Table 4 Statistic table of the potteries of Layer 5 in UnitK10GridI2-I6-J2-J6 280
    Table5 Statistic table of the potteries of lower Layer 5 in UnitL8GridG5-F5 280
    Table 6 Statistic table of the potteries of between Layer 5 and Layer 6 in UnitL10GridA2-A3 281
    Table 7 Statistic table of the potteries of Layer 6 in UnitI10GridG9, UnitI11GridG2、G3、G4、G5 282
    Table 8 Statistic table of the potteries of Layer 6 in UnitL10GridE5-F6 282
    Table 9 Statistic table of the potteries of Layer 7 in UnitUnitI10GridG9, UnitI11GridG2、G3、G4、G5 283
    Table 10 The periodization of layers and cultural remains at Nateshwar site 331
    彩版1-1 纳提什瓦遗址环境 23
    彩版1-2 纳提什瓦村环境 24
    彩版1-3 蒙希甘杰县内名胜 25
    彩版1-4 达卡法王寺阿底峡相关文物和纪念堂 26
    彩版1-5 拉库罗普尔遗址 27
    彩版1-6 纳提什瓦遗址的原貌 28
    彩版1-7 2014—2015 年中孟第一次联合发掘 29
    彩版1-8 2015—2016 年中孟第二次联合发掘 30
    彩版1-9 2017—2018 年中孟第三次联合发掘 30
    彩版1-10 部分考古队员合影 31
    彩版1-11 队员风采 32
    彩版1-12 工地掠影 33
    彩版1-13 工地掠影 34
    彩版1-14 生活花絮 35
    彩版1-15 工作、生活花絮 36
    彩版1-16 领导的关注 37
    彩版1-17 领导的关注 38
    彩版1-18 领导的关注 39
    彩版1-19 来自各国的来访者 40
    彩版1-20 公共考古宣传 41
    彩版1-21 “毗诃罗普尔遗址考古发掘和文物保护国际研讨会”在达卡贾汉吉纳格尔大学举行 42
    彩版2-1 地层及灰坑H2 67
    彩版2-2 地层及出土陶器 68
    彩版2-3 地层剖面 69
    彩版2-4 UnitI10GridG8、G9、G10,UnitI11GridG1、G2、G3、G4、G5 剖面 70
    彩版2-5 UnitK9GridA8、B8、C8、D8、E8、F8、G8、H8 剖面 71
    彩版2-6 地层剖面 72
    彩版2-7 UnitK7GridI10,UnitK8GridI1-I10,UnitK9GridI1-I7 剖面 73
    彩版2-8 地层剖面 74
    彩版3-1 第一期遗迹全景 150
    彩版3-2 神殿1 外墙 151
    彩版3-3 神殿1 全景 152
    彩版3-4 神殿1 门厅 153
    彩版3-5 神殿1 相关遗迹 154
    彩版3-6 神殿1 墙角瓮1、瓮2 155
    彩版3-7 房屋6、房屋7 和道路1 156
    彩版3-8 道路3 北部 157
    彩版3-9 道路3 中南部 158
    彩版3-10 浴室和排水沟 159
    彩版3-11 神殿2 160
    彩版3-12 神殿2 东墙基 161
    彩版3-13 神殿2 东墙外遗迹 162
    彩版3-14 神殿2 东墙外陶器和河光石 163
    彩版3-15 神殿2 北墙 164
    彩版3-16 隔墙 165
    彩版3-17 隔墙根下出土陶器 166
    彩版3-18 隔墙根下出土陶器 167
    彩版3-19 房屋1 168
    彩版3-20 房屋2 169
    彩版3-21 房屋3、4 170
    彩版3-22 房屋5 全景 171
    彩版3-23 房屋5 局部 172
    彩版3-24 墙1、2、3 173
    彩版3-25 路面4、道路4 174
    彩版3-26 十字形中心神殿全景 175
    彩版3-27 中心塔基地层和柱厅1 发掘前地表 176
    彩版3-28 柱厅1 全景 177
    彩版3-29 柱厅1 全景 178
    彩版3-30 柱厅1 东墙基 179
    彩版3-31 柱厅1 北墙基 180
    彩版3-32 柱厅1 南墙基、西墙基 181
    彩版3-33 柱厅1 柱基1 182
    彩版3-34 柱厅1 柱基2 183
    彩版3-35 柱厅1 柱基3、4 184
    彩版3-36 柱厅2 全景 185
    彩版3-37 柱厅2 全景(2014—2015 年发掘后) 186
    彩版3-38 柱厅2 全景(2015—2016 年发掘后) 187
    彩版3-39 柱厅2 东墙基、南墙基 188
    彩版3-40 墙柱厅2 西墙基 189
    彩版3-41 柱厅2 北墙基 190
    彩版3-42 柱厅2 柱基1 191
    彩版3-43 柱厅2 柱基2、3、4 192
    彩版3-44 柱厅3 全景 193
    彩版3-45 柱厅3 墙基 194
    彩版3-46 柱厅3 柱基 195
    彩版3-47 柱厅4 全景 196
    彩版3-48 柱厅4 全景 197
    彩版3-49 柱厅4 东墙基、南墙基 198
    彩版3-50 柱厅4 西墙基、北墙基 199
    彩版3-51 柱厅4 柱基1、2 200
    彩版3-52 柱厅4 柱基1、2 201
    彩版3-53 柱厅4 柱基3、4 202
    彩版3-54 连接墙基1 203
    彩版3-55 连接墙基2 204
    彩版3-56 连接墙基3、4 205
    彩版3-57 中心塔基和柱厅4 全景 206
    彩版3-58 中心塔基局部遗迹 207
    彩版3-59 中心塔基东、北、西端 208
    彩版3-60 北门道全景 209
    彩版3-61 北门道局部 210
    彩版3-62 护墙基和巴哈布尔遗址复原图 211
    彩版3-63 出土装饰砖 212
    彩版3-64 八边形佛塔1 全景 213
    彩版3-65 八边形佛塔1 内部 214
    彩版3-66 八边形佛塔1 局部 215
    彩版3-67 八边形佛塔2 全景 216
    彩版3-68 八边形佛塔2 塔身部分 217
    彩版3-69 八边形佛塔2 前厅部分 218
    彩版3-70 八边形佛塔3、曲折形围墙1 219
    彩版3-71 路面1 平面位置 220
    彩版3-72 路面1 遗迹 221
    彩版3-73 路面3、H2 222
    彩版4-1 ①、②层陶器 285
    彩版4-2 ②、④层陶器 286
    彩版4-3 H1陶器 287
    彩版4-4 ④层陶器 288
    彩版4-5 ④层陶器 289
    彩版4-6 ⑤层陶器 290
    彩版4-7 ⑤层陶器 291
    彩版4-8 瓮1 陶器 292
    彩版4-9 瓮1 陶器 293
    彩版4-10 瓮1 陶器 294
    彩版4-11 瓮1、瓮2 陶器 295
    彩版4-12 瓮2 陶器 296
    彩版4-13 ⑥层表面陶器 297
    彩版4-14 ⑥层陶器 298
    彩版4-15 ⑥层陶器 299
    彩版4-16 ⑥层陶器 300
    彩版4-17 ⑥层陶器 301
    彩版4-18 ⑦层陶器 302
    彩版4-19 ⑦层陶器 303
    彩版4-20 ⑦层陶器 304
    彩版4-21 陶片纹饰 305
    彩版4-22 陶片纹饰 306
    彩版4-23 陶片纹饰 307
    彩版4-24 毗诃罗普尔地区出土文物 314
    彩版4-25 出土瓷片 315
    彩版4-26 出土文物 316
    彩版4-27 毗诃罗普尔地区出土砖雕 317
    彩版4-28 毗诃罗普尔地区出土砖雕 318
    彩版4-29 毗诃罗普尔地区出土石雕造像 319
    彩版4-30 毗诃罗普尔地区出土石雕造像 320
    彩版4-31 毗诃罗普尔地区出土石雕造像 321
    彩版4-32 毗诃罗普尔地区出土石雕造像 322
    彩版4-33 毗诃罗普尔地区出土石雕造像 323
    彩版4-34 毗诃罗普尔地区出土石雕造像 324
    Color Plate 1-1 The environment at Nateshwar site 23
    Color Plate 1-2 The environment of the Nateshwar Village 24
    Color Plate 1-3 The places of interest in Munshiganj district 25
    Color Plate 1-4 The related relics of Atisha Dipankar at Dharmarajika Buddhist temple in Dhaka and the memorial hall under construction 26
    Color Plate 1-5 The cultural remains at Raghurampur site, Vikrampura 27
    Color Plate 1-6 The original landscape of Nateshwar site 28
    Color Plate 1-7 The China-Bangladesh first joint excavation during 2014-2015 29
    Color Plate 1-8 The China-Bangladesh second joint excavation during 2015-2016 30
    Color Plate 1-9 The China-Bangladesh third joint excavation during 2017-2018 30
    Color Plate 1-10 The group photo of some archaeological team members 31
    Color Plate 1-11 Team members 32
    Color Plate 1-12 A glance at excavation site 33
    Color Plate 1-13 A glance at excavation site 34
    Color Plate 1-14 Life trivia 35
    Color Plate 1-15 Trivia of work and life 36
    Color Plate 1-16 The care from the leaders 37
    Color Plate 1-17 The care from the leaders 38
    Color Plate 1-18 The care from the leaders 39
    Color Plate 1-19 The visitors from all over the world 40
    Color Plate 1-20 Public archaeology 41
    Color Plate 1-21 The “Seminar on Archaeological excavation and Conservation of Nateshwar Site,Vikrampura” was held at Jahangirnar University 42
    Color Plate 2-1 The layers and ash pit (H2) 67
    Color Plate 2-2 The layers and unearthed potteries 68
    Color Plate 2-3 Stratigraphic section 69
    Color Plate 2-4 The section of UnitI10GridG8, G9, G10, UnitI11GridG1, G2, G3, G4, G5 70
    Color Plate 2-5 The section of UnitK9GridA8, B8, C8, D8, E8, F8, G8, H8 71
    Color Plate 2-6 Stratigraphic section 72
    Color Plate 2-7 The section of UnitK7GridI10, UnitK8GridI1-I10 and UnitK9GridI1-I7 73
    Color Plate 2-8 Stratigraphic section 74
    Color Plate 3-1 The panorama of the first period ?s cultural remains 150
    Color Plate 3-2 The outer wall of Temple 1 151
    Color Plate 3-3 The panorama of Temple 1 152
    Color Plate 3-4 The entrance hall of Temple 1 153
    Color Plate 3-5 The related relics of Temple 1 154
    Color Plate 3-6 The Urn 1 and Urn 2 at the corners of Temple 1 155
    Color Plate 3-7 House 6, House 7 and Road 1 156
    Color Plate 3-8 The north of Road 3 157
    Color Plate 3-9 Southern and central part of Road 3 158
    Color Plate 3-10 Bathroom and drainage 159
    Color Plate 3-11 Temple 2 (pyramid-shaped stupa) 160
    Color Plate 3-12 The eastern wall foundation of Temple 2 (pyramid-shaped stupa) 161
    Color Plate 3-13 The remains outside of the eastern wall of Temple 2 (pyramid-shaped stupa) 162
    Color Plate 3-14 The unearthed potteries and processed cobbles outside the eastern wall of Temple 2 (pyramid-shaped stupa) 163
    Color Plate 3-15 The northern wall of Temple 2 (pyramid-shaped stupa) 164
    Color Plate 3-16 Partition wall 165
    Color Plate 3-17 The potteries unearthed at the foot of partition wall 166
    Color Plate 3-18 The potteries unearthed at the foot of partition wall 167
    Color Plate 3-19 House 1 168
    Color Plate 3-20 House 2 169
    Color Plate 3-21 House 3, House 4 170
    Color Plate 3-22 The panorama of House 5 171
    Color Plate 3-23 Some parts of House 5 172
    Color Plate 3-24 Wall 1, Wall 2, and Wall 3 173
    Color Plate 3-25 Floor 4, Road 4 174
    Color Plate 3-26 The panorama of the Cruciform Central Temple 175
    Color Plate 3-27 The stratigraphy of central temple foundation and the surface
    of Pillared-hall 1 before excavation 176
    Color Plate 3-28 The panorama of Pillared-hall 1 177
    Color Plate 3-29 The panorama of Pillared-hall 1 178
    Color Plate 3-30 The eastern wall foundation of Pillared-hall 1 179
    Color Plate 3-31 The northern wall foundation of Pillared-hall 1 180
    Color Plate 3-32 The southern and western wall foundations of Pillared-hall 1 181
    Color Plate 3-33 The Pillar-plinth 1 of Pillared-hall 1 182
    Color Plate 3-34 The Pillar-plinth 2 of Pillared-hall 1 183
    Color Plate 3-35 The Pillar-plinth 3, 4 of Pillared-hall 1 184
    Color Plate 3-36 The panorama of Pillared-hall 2 185
    Color Plate 3-37 The panorama of Pillared-hall 2 (after excavation during 2014-2015) 186
    Color Plate 3-38 The panorama of Pillared-hall 2 (after excavation during 2015-2016) 187
    Color Plate 3-39 The eastern and southern wall foundations of Pillared-hall 2 188
    Color Plate 3-40 The western wall foundation of Pillared-hall 2 189
    Color Plate 3-41 The northern wall foundation of Pillared-hall 2 190
    Color Plate 3-42 The Pillar-plinth 1 of Pillared-hall 2 191
    Color Plate 3-43 The Pillar-plinth 2, 3 and 4 of Pillared-hall 2 192
    Color Plate 3-44 The panorama of Pillared-hall 3 193
    Color Plate 3-45 The wall foundation of Pillared-hall 3 194
    Color Plate 3-46 The Pillar-plinth of Pillared-hall 3 195
    Color Plate 3-47 The panorama of Pillared-hall 4 196
    Color Plate 3-48 The panorama of Pillared-hall 4 197
    Color Plate 3-49 The eastern and southern wall foundations of Pillared-hall 4 198
    Color Plate 3-50 The western and northern wall foundations of Pillared-hall 4 199
    Color Plate 3-51 The Pillar-plinth 1,2 of Pillared-hall 4 200
    Color Plate 3-52 The Pillar-plinth 1, 2 of Pillared-hall 4 201
    Color Plate 3-53 The Pillar-plinth 3, 4 of Pillared-hall 4 202
    Color Plate 3-54 The Connective Wall Foundation 1 203
    Color Plate 3-55 The Connective Wall Foundation 2 204
    Color Plate 3-56 The Connective Wall Foundation 3 and 4 205
    Color Plate 3-57 The panorama of central temple foundation and Pillared-hall 4 206
    Color Plate 3-58 The partial remains of central temple foundation 207
    Color Plate 3-59 The east, north and west ends of central temple foundation 208
    Color Plate 3-60 The panorama of north entrance 209
    Color Plate 3-61 Some local parts of north entrance 210
    Color Plate 3-62 The parapet wall and the imagination reconstruction of central temple at Paharpur monastery 211
    Color Plate 3-63 The unearthed decorative bricks 212
    Color Plate 3-64 The panorama of Octagonal Stupa 1 213
    Color Plate 3-65 The interior of Octagon Stupa 1 214
    Color Plate 3-66 The exterior of Octagon Stupa 1 215
    Color Plate 3-67 The panorama of Octagonal Stupa 2 216
    Color Plate 3-68 The body of Octagonal Stupa 2 217
    Color Plate 3-69 The mandapa of Octagonal Stupa 2 218
    Color Plate 3-70 The Octagonal Stupa 3, Zigzag Boundary Wall 1 219
    Color Plate 3-71 The location plan of Floor 1 220
    Color Plate 3-72 Floor 1 221
    Color Plate 3-73 Floor 3, ash pit H2 222
    Color Plate 4-1 The potteries of Layer 1 and Layer 2 285
    Color Plate 4-2 The potteries of Layer 2 and Layer 4 286
    Color Plate 4-3 The potteries from H1 287
    Color Plate 4-4 The potteries of Layer 4 288
    Color Plate 4-5 The potteries of Layer 4 289
    Color Plate 4-6 The potteries of Layer 5 290
    Color Plate 4-7 The potteries of Layer 5 291
    Color Plate 4-8 The potteries from Urn 1 292
    Color Plate 4-9 The potteries from Urn 1 293
    Color Plate 4-10 The potteries of Urn 1 294
    Color Plate 4-11 The potteries of Urn 1 and Urn 2 295
    Color Plate 4-12 The potteries from Urn 2 296
    Color Plate 4-13 The potteries on the surface of Layer 6 297
    Color Plate 4-14 The potteries of Layer 6 298
    Color Plate 4-15 The potteries of Layer 6 299
    Color Plate 4-16 The potteries of Layer 6 300
    Color Plate 4-17 The potteries of Layer 6 301
    Color Plate 4-18 The potteries of Layer 7 302
    Color Plate 4-19 The potteries of Layer 7 303
    Color Plate 4-20 The potteries of Layer 7 304
    Color Plate 4-21 Pottery decoration 305
    Color Plate 4-22 Pottery decoration 306
    Color Plate 4-23 Pottery decoration 307
    Color Plate 4-24 The artifacts unearthed in Vikrampura area 314
    Color Plate 4-25 The unearthed porcelain fragments 315
    Color Plate 4-26 The unearthed artifacts 316
    Color Plate 4-27 The brick scuptures unearthed in Vikrampura area 317
    Color Plate 4-28 The brick scuptures unearthed in Vikrampura area 318
    Color Plate 4-29 The stone statues unearthed in Vikrampura area 319
    Color Plate 4-30 The stone statues unearthed in Vikrampura area 320
    Color Plate 4-31 The stone statues unearthed in Vikrampura area 321
    Color Plate 4-32 The stone statues unearthed in Vikrampura area 322
    Color Plate 4-33 The stone statues unearthed in Vikrampura area 323
    Color Plate 4-34 The stone statues unearthed in Vikrampura area 324
帮助中心
公司简介
联系我们
常见问题
新手上路
发票制度
积分说明
购物指南
配送方式
配送时间及费用
配送查询说明
配送范围
快递查询
售后服务
退换货说明
退换货流程
投诉或建议
版权声明
经营资质
营业执照
出版社经营许可证